Because Our Work is Never Done, or How To Make Art with an iPad (and Hot Dogs)

OMG we managed to cover SO MUCH in the past two weeks!!!
Many thanks to all of our talented and knowledgeable contributors for sharing their arcane art-making secrets. We can only go forward.
Contributors:
Mark Beasley, Nick Briz, AMJ Crawford, Jake Elliott, Eric Fleischauer, Alan & Michael Fleming, Jesse McLean, Jonathan Vingiano, Andrew Norman Wilson, and (introducing) Bob Hotdog.
And because the work of an artist is never done, we have one last instructional for those of you ten steps ahead of the rest of us and already making art with your iPad! Here’s “How to Recreate a Famous Movie w/ Animation, Hotdogs & iPad!”
How To Embed A Microcontroller Inside a Sea Shell to Generate “Real” Ocean Sounds
In this How-To, we’ll go through the steps of assembling a small circuit to generate a continuous ocean sound from a microcontroller. This will require some basic soldering skills and a computer, along with some affordable and widely available electronic components.
Note: Each step has a selectable i at the top left corner with short captions for each step.
Resources
How To Play a Vonome
You’ve probably already heard of the Monome, or (if you went to ITP), you may have even already made one of your own. In this tutorial, we’re going to take things a step further and show you how to play a Vonome.

First, download the Vonome software, along with sample files, here:
-Mac users, you’ll need Perian, “the Swiss Army Knife of Quicktime”
-PC users, you’ll need a Mac prbly
Once you’ve downloaded and unzipped the folder, you should see the application itself, a readme file, the schematic, some example video files you can delete once you get what’s going on, and the all-important themovies.txt file.
Now, sit back, watch the video demo below, then get at it!
How To Harness the Creative Potential of the Video Feedback Loop
Video feedback. It’s a phenomenon as old as the medium of video itself. In fact, it might even be considered an inherent attribute. The infinite tunnel of psychedelic light-forms that make up a feedback pattern can have a powerful effect on any viewer and has the benefit of coming pre-loaded with all sorts of “meta” connotations; making it particularly effective at aiding your exploration into ideas about perception, phenomenology, image-making, or even the medium mediating itself.
In this tutorial, we’ll show you how to harness the creative potential of the video feedback loop by combining abstract, hypnotic visual patterns with the semiotic specificity of language to create formally unique videos/concrete poems/screen-savers.
What you’ll need: video camera (with an A/V output), tripod, television or monitor with a line-in, appropriate video cable, text printed out on transparency sheet (make a trip to your neighborhood Kinko’s FedEx copy shop), and basic knowledge of video editing software (or a friend who has it).
PRE–PRODUCTION
Get your hands on a decent video camera – cheaper photo/video hybrids and cell phones won’t work here because the camera needs to have a line-out with a live signal to create feedback. Also, the more control you have over things like zoom, focus, and exposure, the more you can manipulate the images you’re creating.
When choosing your television or monitor, consider the aesthetic implications of your decision; plasma, LCD and CRT monitors each use different technologies and will each respond in a unique way. In terms of size, avoid extremes. Since you’ll be adding another layer to the screen with a transparency, you might try to match the size of the monitor with your printout.
How To Use Python To Create A Simple Flickr Photo Glitcher
In today’s How To, we’ll write a small program in Python that searches the photo sharing site Flickr for images with a given tag, downloads them, and then glitches them out. We won’t presume you know anything about Python programming, but we also won’t cover it in much depth–the goal is for you to understand just enough about this small program to modify it to suit your purposes, even if it’s not 100% clear what’s happening at every stage.
First you’ll need to be sure you have Python installed and know how to run Python programs. We recommend the excellent Learning Python the Hard Way for a straightforward guide to getting up and running with Python on your choice of computer, available online for free. Do at least Exercise 0 in that guide to be sure you have Python installed and know how to run it.
Next, you’ll need a few modules which add extra functionality to Python: PIL (not the band) for image manipulation and BeautifulSoup to parse Flickr’s search results. We’d also recommend using easy_install or pip when adding new modules to your Python setup.
Then, fire up your text editor of choice and enter this code:
For the most part, this code should read like a description of what the program will do in plain English (plus some funky punctuation and that __name__ == ‘__main__’ thing which you can ignore for now). The first few lines tell Python to load in the modules we’ll be using to write the program. The commands “find_an_image,” “download_an_image,” and “glitch_an_image” are commands that we’ll define ourselves in just a minute. Basically, our program will find an image on Flickr that uses the tag ‘art,’ download the image, glitch the image, and finally print out the image’s filename. You can change ‘art’ to any keyword you like. We might be a little biased here, so we’re just going to leave it like that.
How to Climb the Tallest Mountain
1. Collect as many images of mountains as you can get. Source from Internet using Google, Corbis, etc…. Images should not contain any visible evidence of human technology or the presence of actual humans. Images should be as majestic as possible. Collect between 150-200 images.
2. Bring your images into Photoshop or your preferred image editing software. Remove the sky from every image. Cut-out sky area should become transparent.
3. Resize every image to same width and resolution (height may vary).
4. Separate mountains into different folders based on color.
5. Create a new Photoshop document. For the size, use the width and resolution already established in your prep work (see Step 4). Determine an average height and multiply this by your total number of images. Make a rough estimation and adjust later as needed. This document will become enormous in terms of pixel dimensions and document size but can retain a low resolution, i.e. 10” x 1200” at 72 dpi.
6. Begin ordering your images based on chromatic scale. Begin with grey and move to green, yellow, orange, red, pink, purple, blue and finish with white. Save often.
7. The top few images (3 or 4) and the bottom images must be exactly the same and in the same order to allow for seamless looping.
How to Make a Series of Poignant Conceptual Sculptures Based on the Physical Differences Between Your Body and Another Person’s Body
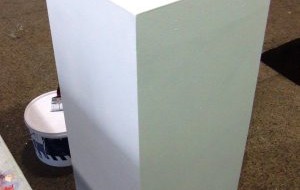
Step 1 – Measure
Begin by taking the measurements of yourself and someone else (this could be your artistic collaborator, your lover, someone you dislike, your dog, etc.). For both you and your partner, measure height, weight and age. Next, subtract the other persons’ measurements from your measurements. Write down the results. Example: Person A is 150 lbs. and person B is 175 lbs.
175 – 150 = 25 lbs.
Step 2 – Find your Material: Difference in Height and Weight
Next, find one material that exactly matches the constraints of your difference in height and weight. Depending on how drastic your difference is, the ideal material could vary between something very light, heavy, large or small. Whether it is wood, sand, metal, plaster, feathers, etc. your material should be chosen based on how precisely it fits into the constraint of your difference in height and weight. The form is up to you and could be dependent on your choice of material (a pile, a sphere, a cube, etc.) Example: A difference in height of 12″ and a difference in weight of 3 lbs. might result in a cube of solid wood.
Step 3 – Find your Material: Difference in Age
Next, find an object or material that exactly matches the constraints of your difference in age. The material or object should be representative of time and duration in some form, whether abstract or literal. This could be something as simple as a wristwatch, a digital clock or a calendar. Or it could be something less literal; a material that represents time more metaphorically, such as a pile of sand. As with your difference in height and weight, your material will be dependent on the vastness of your difference in age. A one-year age difference would produce drastically different results and materials from a ten-minute age difference.
Step 4 – Display
Once you have found or fabricated your objects, you will choose how to display them. If they are small enough, you can place them on a pedestal or shelf. If they are larger, you may choose to place them directly on the floor. Now take a step back and try to think of a good title for your piece. Never underestimate the power of a good title.


How To Make a Blogging Robot
One of the most undeniably thrilling things about the web today is the endless opportunity it affords for interacting with complete strangers. One downside is that it’s often pretty difficult to tell whether that stranger is a human or a robot, particularly when those online interactions are limited strictly to text, as they often are. People fall in love with robots on dating sites all the time, or have eleven-hour conversations with chatbots on Instant Messenger. In an art context, the history of bots goes back as far as the theatrical automata of Leonardo Do Vinci up to recent blogs by Cory Arcangel, one of which endlessly apologizes for not posting enough. To help prevent you from neglecting your blogging duties, we’re going to show you how to make your very own blogging robot.
The first thing you will need for this tutorial is a data stream. A database of information or a good API is key to the creation of a good bot. Without the data that represents the way our robot will think, we are at a total loss. This tutorial will use YouTube as a data stream aka our robot’s range of interest.
Our robot will be a Tumblr blog that celebrates the popular internet meme of “planking.” The methodologies introduced in this tutorial can be applied to make a variety of other robots or blogs, thematically. This tutorial assumes you’re on Mac OS X and will require the use of a plain text editor (we’re big fans of TextMate, TextWrangler, or Smultron).
First, lets take a look at the YouTube Data API. For our purposes, the usage of this API will be very straightforward. To retrieve a series of videos from YouTube’s Data API, we must simply send a request to a URL.
https://gdata.youtube.com/feeds/api/videos
Entering the above URL into your browser will return a large amount of XML from YouTube. While this is a whole lot of data, it is useless for us in its current state because we are not specifying what we want. To specify a search term from YouTube and narrow down our results, we’ll have to add some parameters to our query. You can add a parameter to a URL by appending a question mark, followed by the parameter itself. Let’s start by asking for JSON instead of XML. We prefer working with JSON because it’s lightweight and has become much more popular than XML in open source circles in the last few years. You can read more about JSON at http://json.org. Our URL that asks for a JSON response now looks like this:
https://gdata.youtube.com/feeds/api/videos?alt=json
How To Create A Color-Coordinated Site of Relaxation and Bodily Engagement in a Large Scale Exhibition, Airport, Hotel, Mall, Bank, Spa, or Biennial
1.0. Open three windows in Google Chrome – one for Target.com, one for WalMart.com, and one for Google Shopping.
1.1. In each window, begin searching for turquoise and white products that are suitable for an airport, hotel, mall, bank, spa, or biennial lounge. “Aqua,” “Teal,” “Light Blue,” “Cyan,” “Robin Egg Blue,” “Aquamarine,” “Verdigris,” and “Electric Blue” can be useful search terms for yielding turquoise products as well.
1.2. Products should fulfill three main criteria – Synthetic. Futuristic. Soothing. Visit Hellblau for guidance.
How To Create A Bitmap Image File By Hand, Without Stencils
As someone deeply invested in the art world, chances are you’ve found yourself playing art-guide to your friends or relatives on trips to the museum. And chances are, your friends or relatives will consistently praise the old Renaissance paintings, while drawing blank stares at anything modern. “What’s the big deal, I could do that?!”
The issue here, for some reason, is a matter of old-fashioned skill and labor (or lack thereof). Take On Kawara’s Today Series. At first glance, your friends or relatives will inevitably dismiss them (“why would anyone do that?”), but when you explain that Kawara painted the dates by hand without using a stencil they are immediately impressed. “Without a stencil?”
The artist’s labor has always been a precarious currency in the art market; occasionally exchanged for monies, other times for less tangible payments like publicity, access-to-networks or rare experiences. While there are always exceptions to any rule, the amount of labor expended has traditionally remained a mathematical measure of validity for the art objects that result.
In the age of automation, software tools, and outsourced development, how can any digital artist expect to be taken seriously, if the “labor” expended is a matter of keeping up a Tumblr blog or printing out and blowing up Photoshop gradients? Is there some kind of heroic equivalent to making digital images from scratch, “by hand” and “without stencils?” Look no further! In this tutorial we will be showing you how to create a Bitmap Image File (.bmp). A .bmp file, like any image file, is a matrix of pixels sized a particular width by a particular height. We will be creating our .bmp from scratch, by typing in machine code bit by bit. When one hears the term “machine code,” binary-code is likely the first thing that comes to mind. For this tutorial, however, we’ll be working in Hexadecimal. In order to write in Hex code you’ll need a hex editor. You can download Hex Fiend, a free and open source hex editor for MAC, here. (NOTE: Call us crazy, but we’re assuming you’re a MAC user. Don’t worry, the same principles apply to all platforms).
//Hexadecimal Numbers
Hexadecimal is base 16, this means it is a numerical system which uses 16 characters, 0 through 9 and A through F. We’ve put together a chart for you to use as a “cheat-sheet” until you get used to writing in hex.
If you were to continue adding to this chart, decimal 16 would be hexadecimal 10, 17 would be 11, 18 would be 12 and if we jumped a bit further, 26 would be hexadecimal 1A, 27 would be 1B, 28 would be 1C and so on. We’ll be converting larger numbers into hex a bit later on in this tutorial, when we set our .bmp’s width and height.


